The Ulysses writing app is one of the best writing tools for Mac and iOS I’ve ever come across. I use it for all of my writing whether it be a blog, a fictional short story. Now that I’m tackling a new novel, I’m relying on Ulysses Projects to keep everything organized.
Since the app stores all of your sheets and groups inside one main library, things can easily get a little hectic.. I have a great system for organizing my ideas into finished work as well.
But as I embark on this new writing project, I’m finding I need a bit more structure and a repository to keep all my notes and chapters. Otherwise, they might get mixed in with the rest of my writing. To solve this, I’ve turned to the Ulysses Projects feature.
What is a Project in Ulysses
Ulysses Projects reside in a section of your library that is strictly for large writing projects. It is almost like a separate library for one larger project. When I write a novel, I will create a Project.
A Project will only show you sheets and groups about that current project. Any other sheet or group in your library will not be accessible inside the project. This makes projects a great place to focus on your current writing task.
A Ulysses project has its own little library inside which is divided into the two parts, the manuscript and Extra. The manuscript is the section that will eventually be published, while the extra is all the other little things you have for the work. I have groups for ideas, characters, locations, and anything else I might need like an outline or a summary.
You can also set goals for your project like word count and deadlines. These are specific only to the project and stay out of the rest of your library. Sheets can also have their own goal.
Everything inside the Project, such as Groups, Sheets, and Goals, will sync to all of your other devices using iCloud.
Projects are a great way to keep your longer, more intensive writing focused.
Why Use Ulysses Projects for Your Writing
I like to use Projects in Ulysses so that I can collect all my thoughts and research to have on hand while I’m writing. That way, I won’t have to go far or click into more groups to find a character sheet.
It’s also a great way to separate your larger pieces of writing from other things. While my blogging and short stories take over my library, it’s nice to have my novels in a Project.
Going into a project is similar to working in Scrivener, where all your different sheets and groups will combine to make one larger file later. When I’m in the planning stages of writing a novel, I like having all of my content in one spot. That way I can develop my characters, make notes about locations, and more, all within the project and at my fingertips.
Key Features of a Ulysses Project
Inside Ulysses Projects, your left-hand sidebar will change from your standard library to a project-specific view.
The project will be divided into two sections as mentioned. While the upper section doesn’t have a title, this is where your manuscript will live. The lower section is called Extras, and it’s a place to include your notes or any documents you import.
Only the sheets in the upper, manuscript section will get exported when you plan to move your writing out of Ulysses and send it to an editor or a finishing app. All of your notes will remain in the project and won’t be exported.
Above the manuscript section, there are three buttons. The first is for goals. Here you can set goals and deadlines for your project.
The second is the export button for moving your writing out of Ulysses and into a file for sharing. It will compile all the documents in the upper half into one file.
You can also easily rearrange your sheets and groups within the manuscript section by dragging and dropping them. When you are ready to export, Ulysses will compile your document in the exact order they appear here, giving you complete control over the final layout.
Finally, there’s a button to edit your Ulysses Projects. Here you can change the title or icon you selected when you created the Project. You can also share your project from here as well.
Using Ulysses Project Templates
In a recent update to Ulysses, the developers added templates for projects which can help authors get set up even faster.
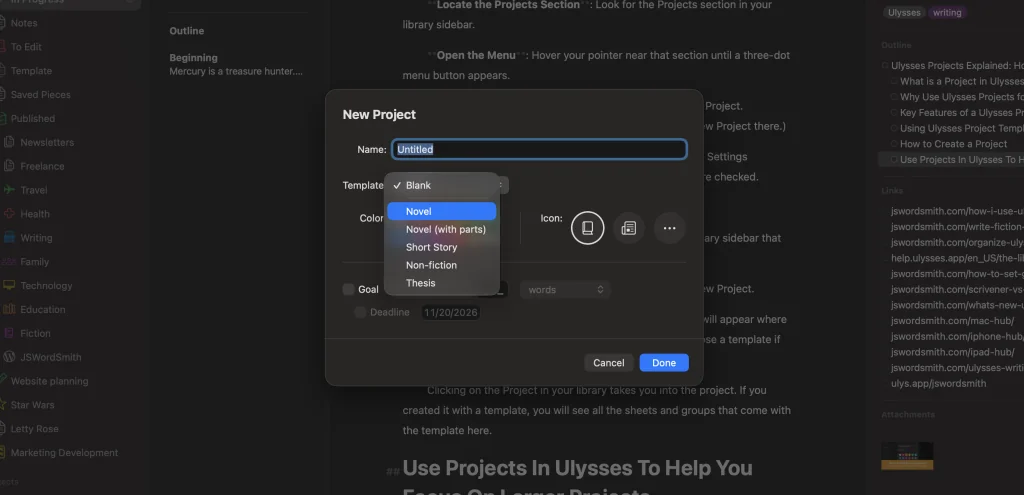
When you create a project, there will be a drop-down menu which allows you to select which type of template you want to use. So for example, if you select a novel, the manuscript gets filled with groups and sheets for things like the Front Matter and a group with some chapters.
If you’ve never used Projects in Ulysses before, this is a great way to see how things could be organized.
The Extras part will also be auto-populated with places for Notes, Characters, Locations, Plot, and Research. You will be free to move, retitle, or add these groups as you see fit.
You can also start a Project without a template. Everything will be blank, and you can create how you want to.
How to Create a Project
To create a Project in Ulysses on Mac, follow these steps:
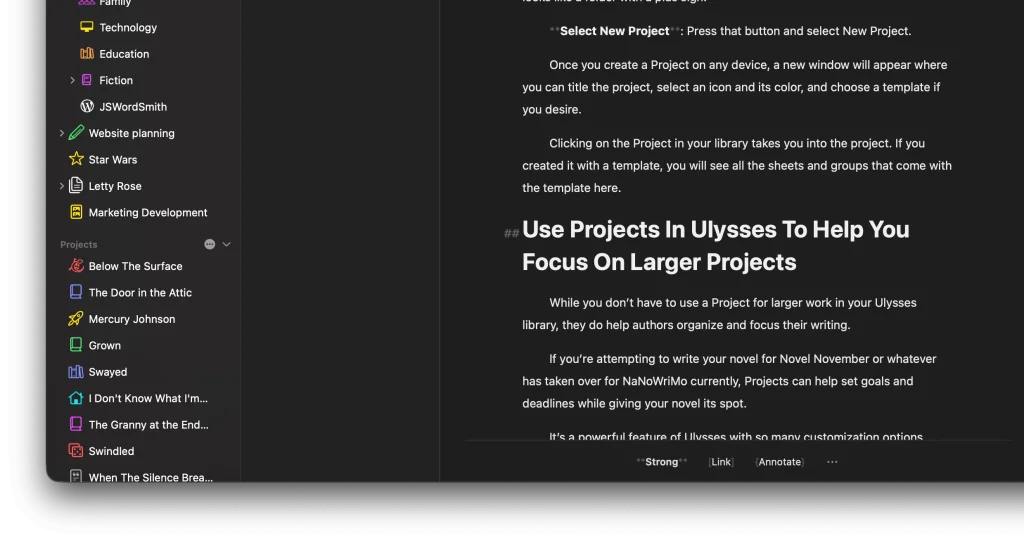
Locate the Projects Section: Look for the Projects section in your library sidebar.
Open the Menu: Hover your pointer near that section until a three-dot menu button appears.
Select New Project: Click the menu and select New Project. (Alternatively, you can click File in the menu bar and select New Project there.)
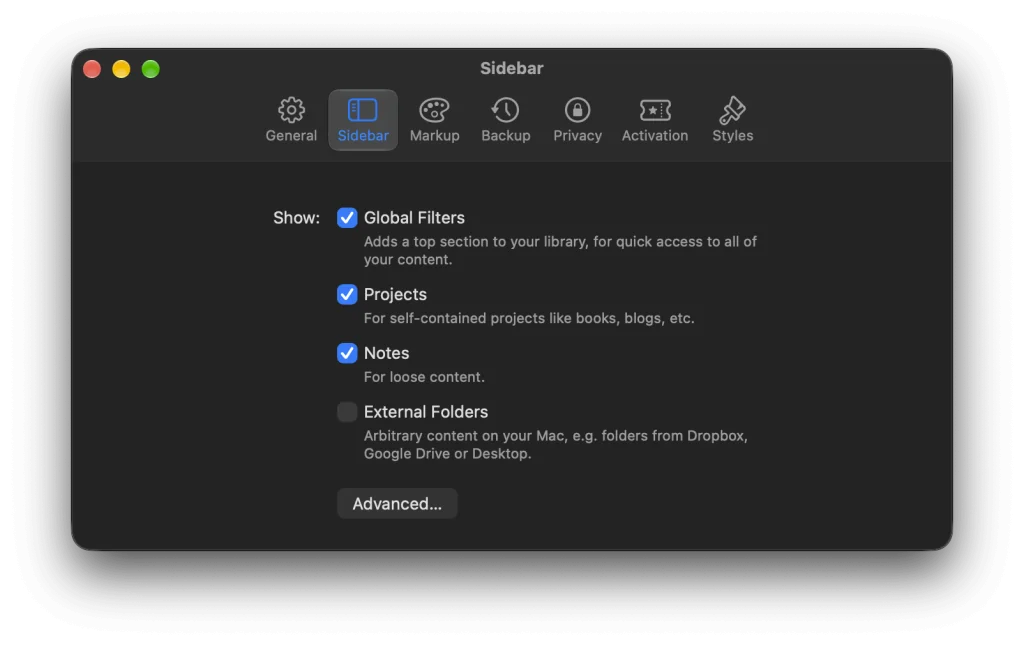
Note: If you don’t see the Projects section, go to Ulysses Settings (CMD+,), select the Sidebar option, and make sure Projects are checked.
To create a Project on iPhone and iPad:


Find the Add Button: Look for the button in your library sidebar that looks like a folder with a plus sign.
Select New Project: Press that button and select New Project.
Once you create a Project on any device, a new window will appear where you can title the project, select an icon and its color, and choose a template if you desire.
Clicking on the Project in your library takes you into the project. If you created it with a template, you will see all the sheets and groups that come with the template here.
Use Projects In Ulysses To Help You Focus On Larger Projects
While you don’t have to use a Project for larger work in your Ulysses library, they do help authors organize and focus their writing.
If you’re attempting to write your novel for Novel November or whatever has taken over for NaNoWriMo currently, Projects can help set goals and deadlines while giving your novel its spot.
It’s a powerful feature of Ulysses with so many customization options.
If you’d like to find out more about Ulysses, make sure to check out my Ultimate Ulysses guide, with tips to get started, how Ulysses compares to other writing apps, and other breakdowns of features. Or if you need some help getting started with your writing, I have a Writing Hub with tips, tricks, and guides to help you get started.
While Ulysses does charge a subscription, if you use my affiliate link you can save 25% off your first year, which will also help the site.
Do you have any questions about Ulysses Projects? Let me know in the comments.

Leave a Reply